The Sigasi Visual HDL (SVH) extension will start once a .project file is detected in the root of the open folder. Make sure that you configure your license before trying to work on a project.
For project configuration, open the Sigasi Projects View.
Creating and Importing Projects
Importing a Project from the File System
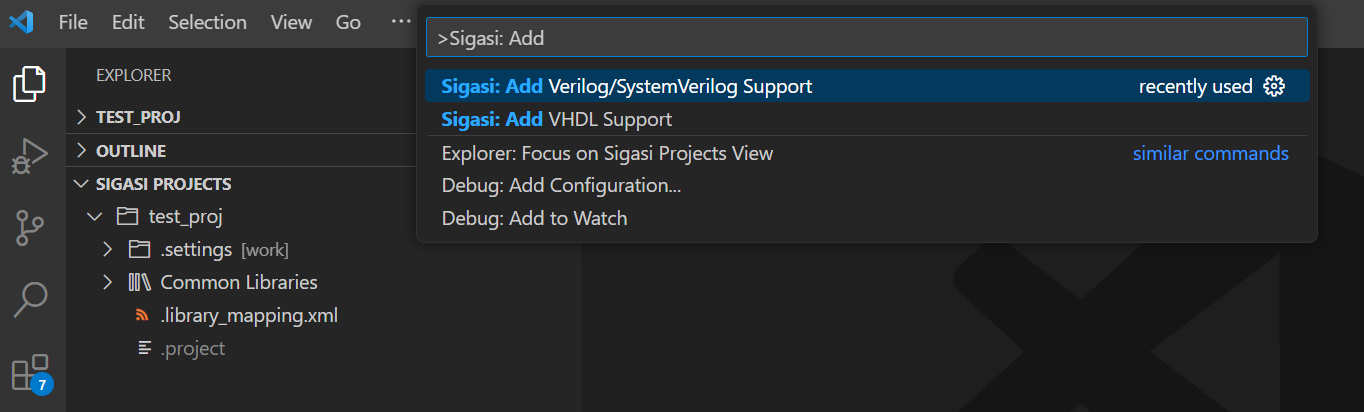
First, open the folder you want to import through (File > Open Folder…). Then, open the Command Palette (Ctrl+Shift+P) and run the command Sigasi: Add Sigasi Support.
Creating a New Project From Scratch
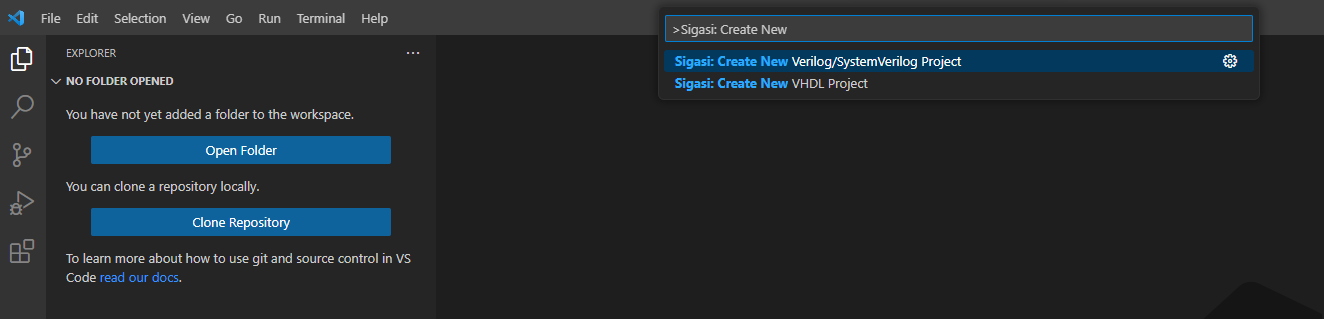
To create a new project, open the Command Pallet (View > Command Pallete…), execute the command Sigasi: Create New Sigasi Project, choose the project location, then give your project a name.
Next, you need to have the project’s root folder to create a .project file in your folder containing the project configurations.
Once the .project file is detected, SVH will fully start, indicated by a Projects View below the default VSC file explorer.
From then on, you should use the Projects View instead of the VSC file explorer.
Every Sigasi project has mixed-language support.
Importing Another Tool’s Project
You can import a project from another tool (e.g., a Quartus project) by first it converting into an SVH project using scripts. Find the scripts and documentation at https://github.com/sigasi/SigasiProjectCreator .
Tutorial and Demo Projects
The extension contains both a tutorial project and demo project.
Tutorial
The tutorial project covers most of Sigasi’s features. Press Ctrl+Shift+P and start typing Sigasi: Create Tutorial Project to open the tutorial.
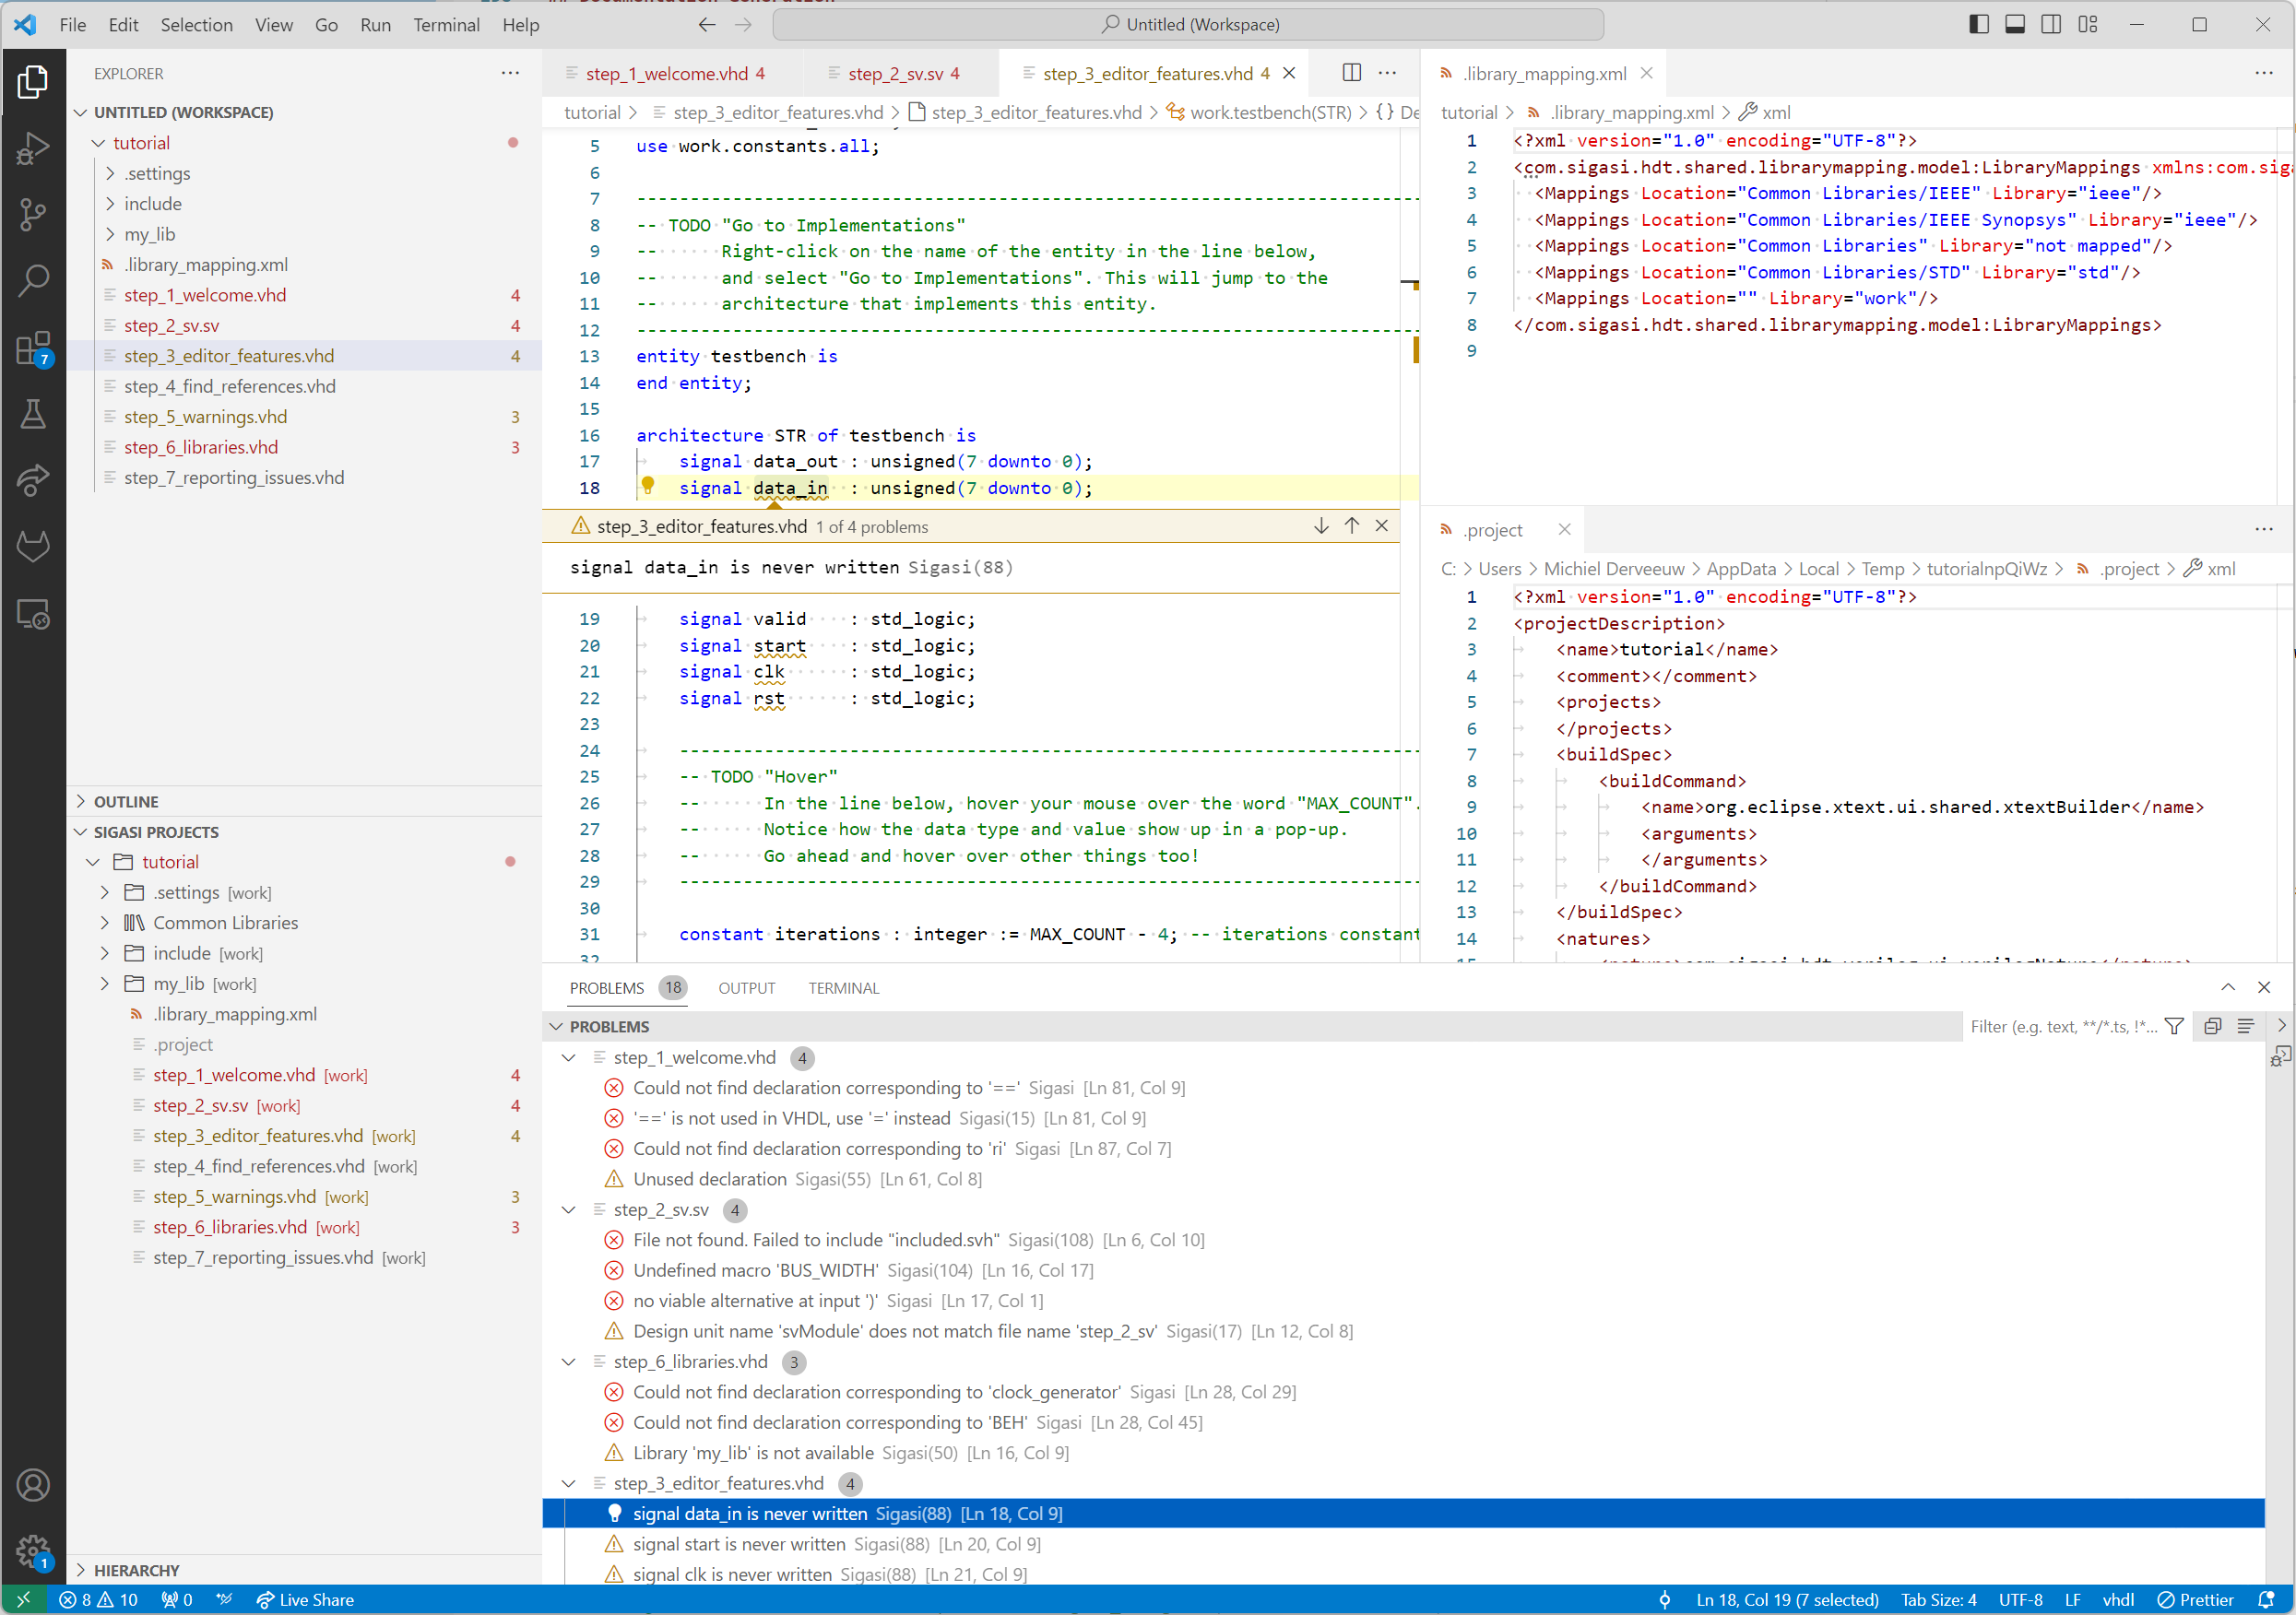
When the extension has finished building the project, you will see a number of issues for some files pop-up in the Projects View.
There will also be several errors and warnings in the status bar, which you can click to open the Problems View. Within that view, you can navigate through the error and warning markers for the project.

See also: Tutorial Project in Sigasi Visual HDL
Demo
You can also open a larger demo project using the command Sigasi: Create Demo Project.
Project Configuration
Library Configuration
VHDL libraries are fully supported. For Verilog/SystemVerilog, Sigasi reuses the VHDL library concept (just work in practice) to distinguish between design files that should and shouldn’t be analyzed.
To change library mappings, you can use the right-click menu in the Sigasi Projects View and select Set Library as shown in the image below.
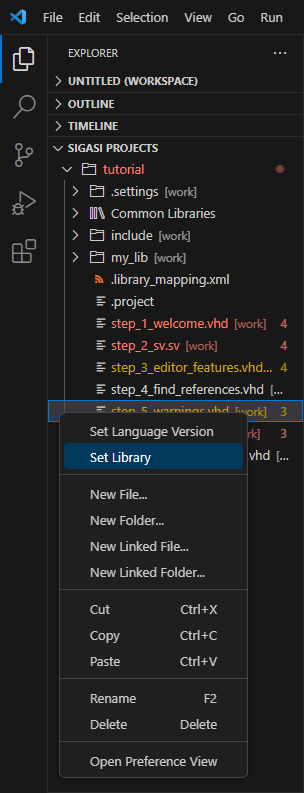
Then, you can select an existing library or choose New Library… to type a new library name.
Once you type a new library name, the file/folder you selected will be added to the library you created.
If you want to add a file/folder to an existing library, you can choose one of the existing ones from the list (such as work).
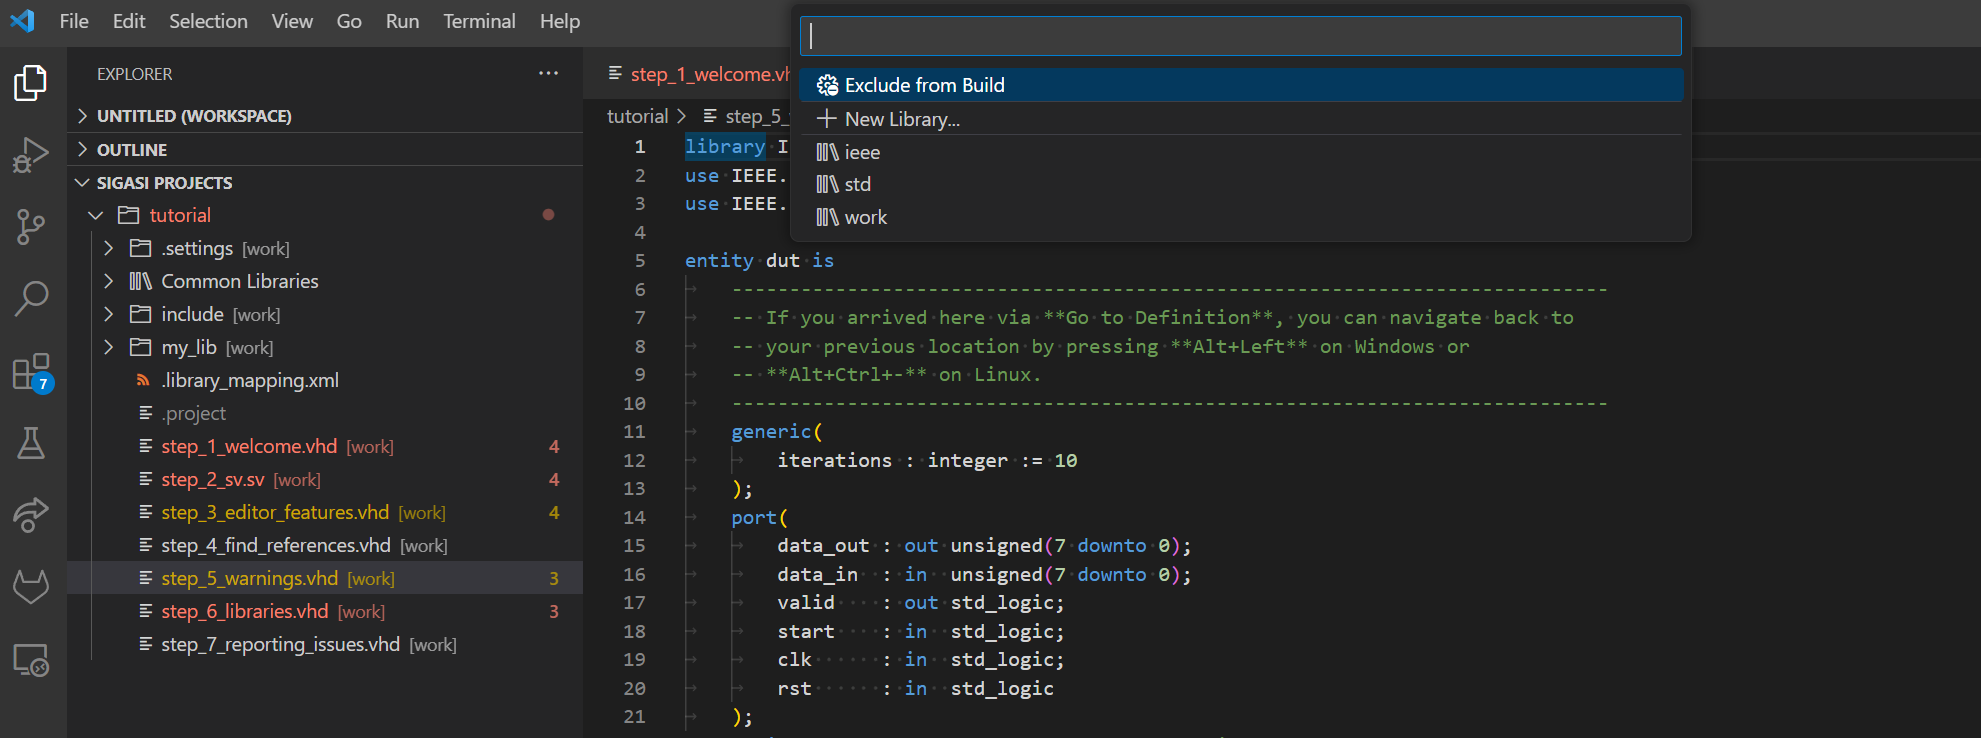
If you want to exclude files/folders from a Sigasi project, select Exclude from Build. Note that the excluded resource(s) will still be visible in the Sigasi Projects View, and you can still add them (Set Library) to the project.
Creating new libraries, adding a file/folder to an existing library, or excluding files/folders from the build will modify your project’s .library_mapping.xml file.
VHDL and Verilog Version
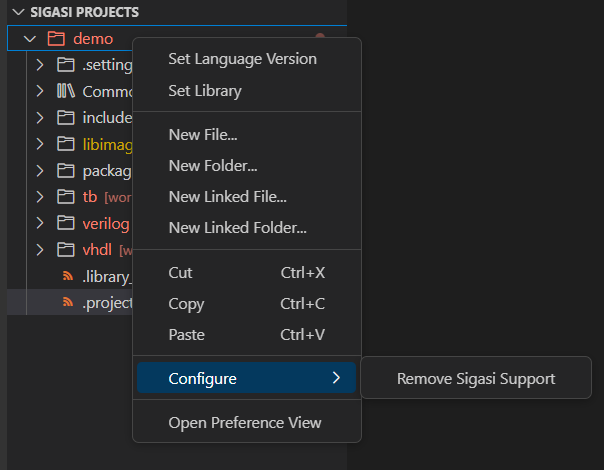
To change the VHDL or Verilog version, right-click on a project, folder, or file in the Sigasi Projects View and click Set Language Version. Then, select whether you want to set the VHDL or Verilog version. If you only see one of the two, you might need to add language support. Be sure to select the version you want.
Sigasi Support
To add or remove Sigasi support, you can right-click on a project from the Sigasi Projects View, click Configure, and Add/Remove Sigasi Support. This will enable or disable Sigasi support.
Workspace
To add a new project to your workspace, press File > Add Folder To Workspace.
Make sure the project you’re adding has a valid .project file.
Linked Resources
Linked resources are a convenient way to link to a file/folder in the Sigasi ecosystem. They work without having to create symlinks or copy content.
To add a linked resource, you can right-click on the node where you want to add it, then click Add Linked File/Add Linked Folder. A file open dialog will pop-up and you can select the file(s)/folder(s) you want to link.
Environment Variables
SVH supports environment variables in its project configuration.
This helps to avoid absolute paths in the .project file.
To use environment variables, you have to prefix the environment variable with ENV-.
For example, to refer to the home directory, you can use ENV-HOME.
Custom Project Variables
Some variables are automatically defined.
PROJECT_LOCwith the PATH of your projectPARENT-<COUNT>-<VARIABLE>which points toCOUNTlevels above the PATH of theVARIABLE
For example, if your project lives in /design/projects/project1, then PARENT-2-PROJECT_LOC/companylibrary points to /design/companylibrary.
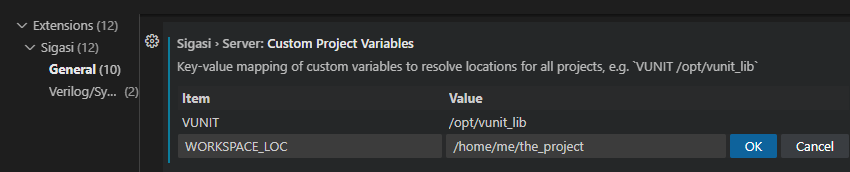
You can also use custom project variables, e.g., VUNIT, to point to your VUnit installation.
You can configure these variables as follows:
- Press Ctrl+Shift+P to open the Command Palette
- Select Preferences: Open Settings (UI)
- In the Setting tab, navigate to Extensions > Sigasi for VHDL & SystemVerilog > General > Custom Project Variables
- Add variables and their values as required
Note that custom project variables can be set on the User level and also per Remote or for a specific Workspace.